Category Archives: Documenting Your Family

Documenting Your Family | Photo Tips | Slow Photography

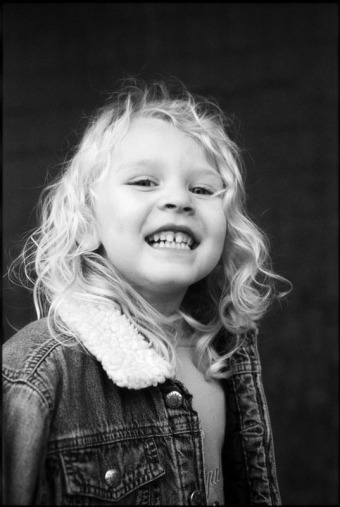
Over on Slate.com there is a recent article about the Slow Photography Movement.  Basically, the idea behind “slow photography” is to think before you  shoot (to be honest, I am a fan of this approach in pretty much anything you happen to be doing). As you may have noticed, this is a theme that I return to often on this blog – think about your frame, consider your camera angle, how will your pictures work as a photo story, etc. The Slate article brings up some interesting points, and I like the general ideas behind the “slow photography” movement; but there are some quotes from the article that I wanted to pull out and discuss.

“…by the logic of volume: If you take a thousand photographs, one or two will turn out great. Professional photographers rely on this logic…”

This is what is often called the “spray and pray” approach to photography, and while there are some “professionals” that use this approach, it is definitely not the norm. Most professionals know that every shutter click has a cost. In the digital world, that cost is time sitting in front of the computer editing photos.

“In slow photography, the basic idea is that photos themselves—the results—are secondary. The goal is the experience of studying some object carefully and exercising creative choice.”

I sort-of see where he is going with this, but I really don’t see how you can separate the “experience” from the “results”. As far as I am concerned, the experience isn’t over until you are holding a print in your hand. The “results”, so easily dismissed in the article, have intrinsic value – be it historical, artistic, or whatever – and that value should not be discounted.

“In the logic of slow photography, the only reason to take photos is to gain access to the third stage, playing around in post-production, whether in a darkroom or using photo-editing tools, an addictive pleasure.”

Maybe it’s just me, but I don’t find a lot of pleasure in doing Photoshop (or darkroom) work. It truly is a means to an end. I want a nice image and so I must go through the post production process (especially with digital captures). Given the choice, I will take some extra time while shooting to ensure better results and less post processing. To me, that is the essence of “slow photography.

“No, the real victim of fast photography is not the quality of the photos themselves. The victim is us. We lose something else: the experiential side, the joy of photography as an activity. And trying to fight this loss, to treat photography as an experience, not a means to an end, is the very definition of slow photography.”

In my experience, quality IS a victim of fast photography. You may end up with a few good shots using the “spray and pray” method. But you will have far superior results using a more considered approach. As for the second part of this quote, again, I don’t think the “experience” of photography can be separated from the final image.  If there is no final image, there is no photography, only looking. Looking is fine, but it’s sure not photography.

I will finish up this post with a slightly older quote that concisely explains what I see as the “slow photography” approach.

“Not many realize that good photographs – like anything else – are made with one’s brains.”
— Edward Weston, October 22, 1924
Tech Info:
Nikon N90s
Nikon 50mm f1.8
Ilford HP5 Plus
DR5 Process (B&W Slide)
Camera Scan
Sigma SD9
Sigma 50mm f2.8 Macro
Photosolve Xtend-a-Slide
Documenting Your Family | Photo Tips | Tell An Authentic Story

With the advent of digital scrapbooking, and inexpensive one-off book printing, it is more important than ever to tell a story with your pictures. Rather than thinking about your final product being a print, think about a series of prints or a layout in your very own coffee table book.

When you work in this way, not every picture needs to be able to stand on it’s own. If fact, they probably shouldn’t. Some pictures will just be there to reveal a detail or give a broader view. Some pictures may even be presented simply to give a visual break. The trick is to remember to shoot these “supporting” images as you are out shooting your more traditional portraits and snapshots.

Also, when you are working in a story format, not every picture needs to be technically perfect. You are free to do some experimentation – dramatic lighting, motion blur, soft focus, interesting angles, etc. These elements can all bring depth to a photo story, as long as you already have a few “safe” shots in the bag.

So, when you are out shooting pictures of your family, try to think about how the pictures you are making will work together as a story and whether that story authentically captures the situation.  Remember to experiment with different techniques and grab some of the supporting shots that will add the flavor to your story.

This weekend, get out with your family and try to find a story to tell. I’ll be curious to find out if you found this information useful.


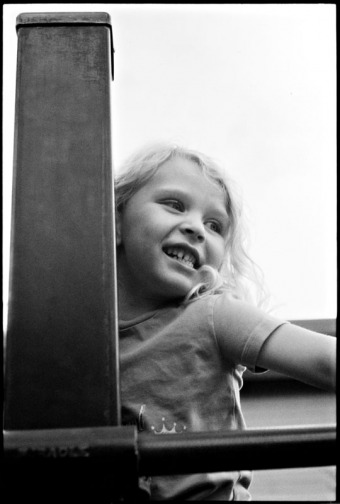
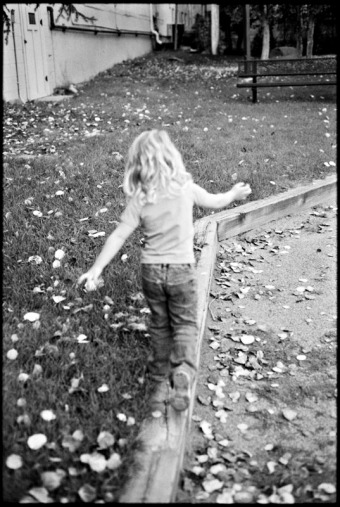
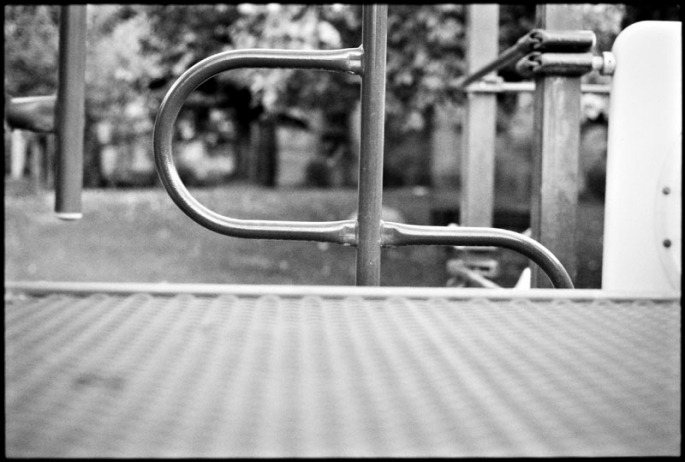
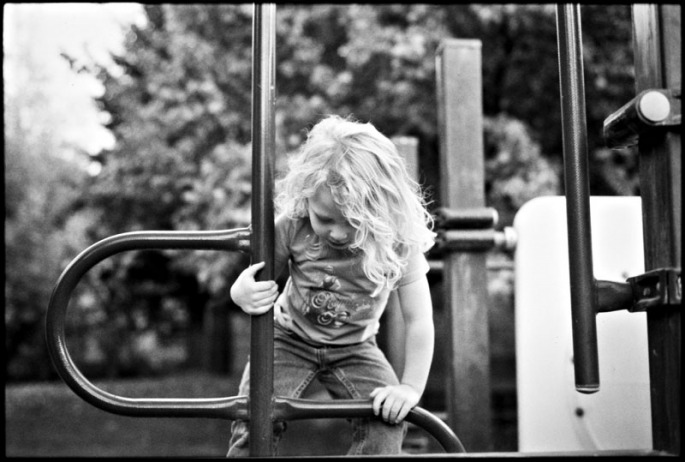
Below is a series of images of Emma that I shot in Glenwood Springs, CO. You will notice that almost all of these are of the more “experimental” variety (my favorite variety) – We have a cropped portrait with dramatic light and motion blur; another portrait shot from a low angle; an “action” shot that focus on leaves and grass rather than Emma walking; a detail picture that doesn’t even include Emma; and a picture of her climbing on the playground, completely unaware of the camera.

Of course, there are a few elements that tie these disparate images together – Emma’s clothes and hair remain consistent, and the pictures were all shot on the same camera/lens/film combination. But I feel like the pictures are really unified and given a purpose by the final, traditional, portrait. It’s clean and sharp and she has a great expression on her face.

You can click on the images to see them larger and read a caption. Enjoy…

Tech Info:
Nikon F3
Nikon 35mm f2.8
Ilford HP5 Plus
DR5 Process (B&W Slide)

Camera Scan
Sigma SD9
Sigma 50mm f2.8 Macro
Photosolve Xtend-a-Slide
Documenting Your Family | Photo Tips | Get On Their Level

One of the keys to getting great pictures of kids, is getting down on their level. This simple step accomplishes a few things…

  • It opens your eyes to the way children see the world, and helps you relate to them.
  • It can give interesting backgrounds that mostly go ignored by us grownups.
  • It helps hold kids’ attention, as they are unaccustomed to having the big people look them in the eye.
  • It makes the little ones smile, they love watching us struggle to move around for a change.
  • It lets your camera really see into a child’s eyes, rather than looking up through their eyelashes

So what does moving down to the kid’s level mean from a technical perspective? Since you are lower and pointing your camera up, you are likely to have some sky or brightly lit background in the frame. This can trick your camera’s light meter and cause the images to be underexposed. Just be aware of this as you are shooting. If your camera allows, it might be a good idea to dial in some exposure compensation.

Another thing to consider is your clothing. When I work with kids, I almost always wear jeans or shorts because I am invariably kneeling, sitting or rolling around on the ground. This makes kids laugh, and keeps the atmosphere light, but it is hard on dress clothes.

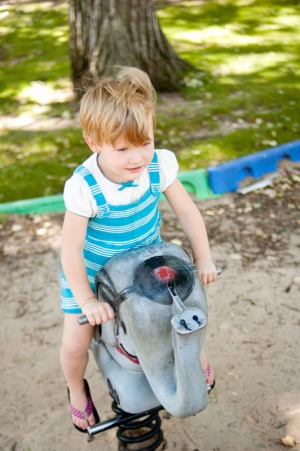
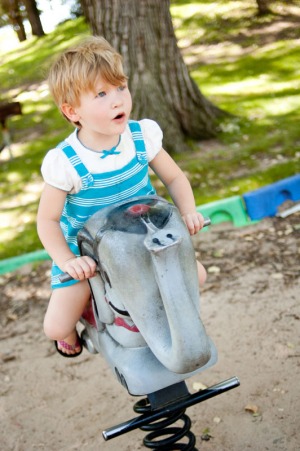
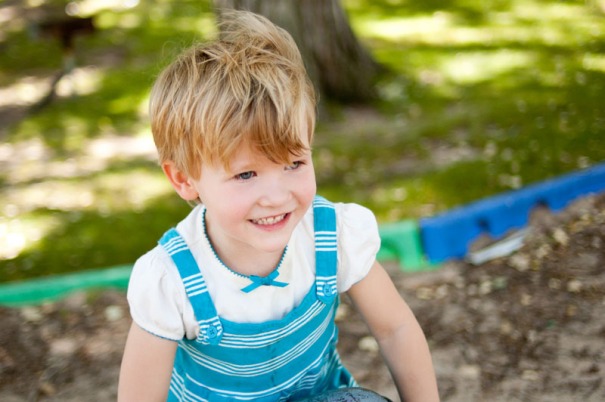
Below are some pictures from a shoot with Molly. You will notice that I was moving up and down as I was shooting these. I was also moving in and out (with my feet, since I don’t really use zoom lenses). I think this is an important point – allowing the kids to move around, and you yourself moving around, keeps everyone animated and engaged.

You can click on any of the images to see them larger. Enjoy…

Tech Info:
Natural Light
Nikon D70s
Nikon 35mm f2
Adobe Camera Raw – no actions or filters

Documenting Your Family | Photo Tips | It’s Your Frame, Use It

  Probably the most famous documentary photographer of all time was Henri Cartier-Bresson. He was best know for images that capture the “decisive moment” (a phrase that he coined). And while his images certainly embody this idea, I think there is another aspect of his work that is too often overlooked – his conscious choice about every element that was included in (or excluded from) his frame. He typically worked with a Leica rangefinder camera, meaning he was not looking through the picture taking lens, but he was still able to beautifully frame his photographs. Neither leaving in extraneous elements or omitting important aspects of the image.

When you are out making pictures of your family, it is important that you be conscious of what is in your frame. Notice that I wrote making pictures, as opposed to taking pictures. That is what you are doing, you are making the decisions about what you include in your frame. Include elements that add to the story or give context, exclude elements that are unnecessary or distracting.

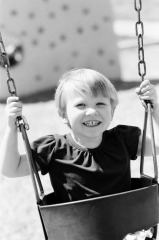
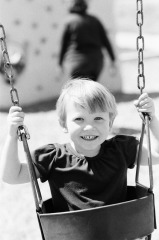
In the two pictures above, you will notice that one works and one doesn’t. The person walking through the background in the second image is distracting and really should not be there. For these shots, I had made the conscious choice to stop the bottom of the frame on the black rubber of the swing and not include Molly’s legs. This did a few things, it helped center her face in the frame, it allowed me to add a lot of the chains to help explain what is going on, and it shows a lot of the climbing wall in the background, adding context to the image. Now it takes a lot longer to write (or read) all of that than it does to actually come to the decision. After you start thinking in this way, it becomes pretty instinctual.

So what went wrong with that second frame? After I had made my decisions and framed the shot, I could only shoot one frame every time Molly swung into the proper position. In the first frame it worked perfectly – Molly swung into frame, I clicked the shutter – bang! – properly framed and focused image. Immediately after I made this image, a woman walked into frame from camera right. I was so busy concentrating on Molly’s position, I didn’t even notice… Until just after I pressed the shutter. No great loss, it was only one frame and I could even crop it to a square and exclude the background if I wanted to. Also, this was a pretty complicated situation. Normally it is pretty easy to look over your entire frame before clicking the shutter.

The trick to nailing this technique is simply to make it a habit to look around your frame before making the picture. I always start by deciding what is my center of interest (the most important thing in the picture) and then placing it where I want it in the frame (generally NOT dead center). I then let my eye do a clockwise lap of the frame edges. This picks up anything weird going on in the rest of the image. I am especially watchful for things that might be cut-off or jutt into frame.

The above process will seem slow at first, but as you get used to it, you will pick up speed and before long it will become a habit and you won’t even realize you are doing it. This habit should really improve the quality of your pictures, especially if you are using a point-and-shoot digital camera where everything is always in focus.

So give this technique a try and let me know what you think.

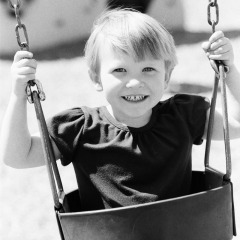
P.S. Here is the second image cropped to exclude the distracting background…

Tech Info:
Nikon F100
Nikon 50mm f1.4
Legacy Pro 400 (AKA Fuji Neopan 400)
Richard Photo Lab

Documenting Your Family | Photo Tips | Back-up Your Images

In Sunday’s Denver Post, buried at the back of the A&E section, was an important article on the challenges of archiving our audio history – http://bit.ly/cmPHOe. These are very similar to the challenges that we all face in archiving the digital images and videos that we are creating to document our families.

In my post last week, I talked about the importance of making prints. Of course, prints are the safest way of archiving your photos, but they don’t do much for videos or if you may want a larger print at some point in the future.

So, in addition to prints, it is imperative that you make digital back-ups of your images (videos). When you shoot pictures on your digital camera or cell phone, the images are saved on relatively stable memory cards. But these cards do “go bad” with no warning. Also, while these cards are in your camera, they hold the only copy of your images. This can be dangerous for a few reasons – loss, theft, breakage & card failure come to mind, so it is a good idea to get the images off of your memory cards as soon as possible. Don’t let them languish on the cards for months at a time.

As you copy the images from your memory cards, remember, you always need to have the digital images stored in at least two places at any given time. Digital data storage is a tricky thing. Drives can just fail with no warning and recovering the data is very expensive (if it is possible at all). Below is a look at my typical back-up workflow…

  1. Shoot, shoot, shoot – I rarely delete anything on the back of the camera. You never know when something in a picture may become important.
  2. Ingest, rename, and add ownership meta-data (I will cover this in a future post) to the images from my memory cards using PhotoMechanic. PhotoMechanic actually ingests the images to two different hard-drives (my primary “Images” drive and my “raw file” archive) at the same time. Automatically ensuring that I have saved the images to two different places – obviously, this is something that you could do on your own, PM just makes it really easy.
  3. At the end of my day, I kick off a system wide back-up. It makes a complete back-up of my entire system, including my “Images” drive. This ensures that I have updated back-ups of all the images that I have worked on that day. So, when this process completes, I have the images that I pulled off of my memory cards saved on at least three drives – raw file archive, Images drive, and back-up drive.
  4. The next morning, I come in and check that the back-up ran successfully. If it did, I go ahead and re-format my memory cards. Note: It is not good to have half used memory cards laying around. If you grab one and load it in your camera, you won’t know whether the images on it have been backed-up.
  5. A final step to consider is “off-site” back-up, which will cover you in the event of a fire or theft. There are a couple of ways that I handle off-site back-up. I upload a lot of our personal images to a Flickr account. This lets me share the pictures with friends and family and also lets me quickly order a bunch of prints. I also like to make CD/DVD back-ups of my “raw-file” archives and store them at a different location.

I know that the above series of steps seems like a big undertaking, and is probably overkill for many people. Documenting families and special events is my job as well as my personal hobby, so keeping those memories protected is something that I am passionate about.

For the average person, a few simple steps may be all that is required to keep your images safe…

  1. Get the images off of your camera and onto your computer
  2. Run a system wide back-up (you should have this for all of your valuable data, not just your images)
  3. Load your favorites to a photo sharing or printing web site
  4. Make prints

How are you protecting your images? I would be interested in hearing how others are working through these issues. Also, let me know if you have questions.

Tech Info:
Sigma SD9
Sigma 50mm f2.8 Macro
Natural light coming through an open door
f3.5 | 1/60 | ISO 100

Documenting Your Family | Photo Tips | Make Some Prints

I wanted to use today’s post to remind you to print your pictures. With the advent of digital photography, we are all shooting far more pictures than we ever have in the past. But I fear we are actually printing far fewer.

I know I am guilty of this, but it is something that I am consciously working on. I have actually moved back to film cameras for a lot of my photography, specifically so I can have a tangible document (a negative). It still makes me nervous that after shooting something on a digital camera, and going through all my back-up procedures (a topic for a future post), I really only have a bunch of ones and zeros on a magnetic disk (or two or three). My feeling is that if you don’t have a print, you don’t have a photograph. For this reason, all of my wedding and family portrait sessions include a complete set of real photographic proof prints.

One of the great things about digital photography is our ability to pick and choose the pictures we want to print. If you shoot fifty pictures at a birthday party, you don’t need to print all fifty, just pick your five favorites and print them. But, don’t forget to print them. The follow through is where we get into trouble.

I would recommend setting up an account with flickr (did you know you can order prints through flickr?), Costco, Adoramapix, Winkflash, Snapfish, or any of the other online print providers and start uploading your favorite pictures.  A quick tip  – the printing is cheap compared to the shipping, so wait until you have enough images to make it worth the shipping costs, or if you live near a Costco, you can order the prints online and pick them up at the store.

When documenting your family, it is critically important to have these memories archived in a tangible way. If you are shooting digitally, you no longer have negatives to fall back on, so prints are your best way to ensure that the memories you have captured will be visible for generations to come.

Tech Info:
Sigma SD9
Sigma 50mm f2.8 Macro
Window light
ISO 100, f4.0, 1/60

Documenting Your Family | Photo Tips | Get Closer

“If your pictures aren’t good enough, you’re not close enough.” – Photojournalist Robert Capa

Robert Capa was a war photographer who was well known for always being right in the middle of the action. He was killed by a landmine while photographing the First Indochina War, on May 25, 1954. His quote above is a reminder for us to get physically closer and become more intimate with those we are photographing. Capa did not accomplish this through the use of long lenses (not in common use prior to 1954), but through proximity.

Getting closer accomplishes a few things:

It lets us understand what is going on and lets our subjects get used to us being around and having a camera. If you stand on the edges of the action and use a long lens to capture images, this will often draw attention and even suspicion. If you are comfortable and involved, people will start to forget about the camera and you can document truly candid moments. Photographing your own family makes this really easy, you are a supposed to be there, all you have done is add a camera to the mix.

Getting closer and using a wide angle lens will allow you to incorporate background into an otherwise intimate photograph. This gives the image a sense of place and tells the viewer what was going on at the time the picture  was captured. This type of picture is often called an environmental portrait.

If you get close while using a normal or short telephoto lens (the max I routinely use is an 85mm) you are able to remove much of the background or turn it into a pleasing blur. This focuses the viewers attention on your main subject and can make for a powerful photograph.

Getting close and being involved with your subjects gives you far more options in terms of lighting and background/foreground elements. If you are standing back and shooting with a long lens, you are pretty much stuck with whatever light direction and elements happen to line up in your frame at the time the shutter is tripped. If your subjects are comfortable with you, and you can move in among them, you can position yourself so there is attractive light, a cool foreground element in the frame, or nice tones/colors in the background. The choice is yours, it is not being dictated by your location or your long lens.

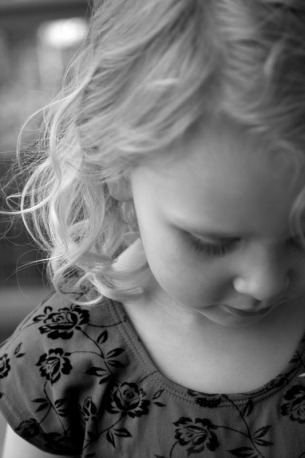
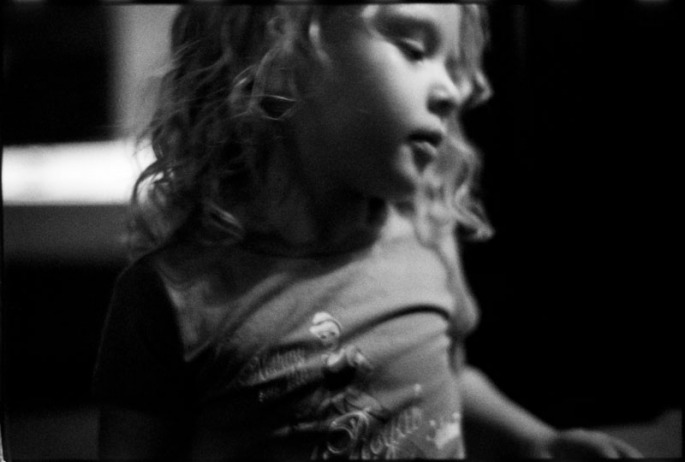
Finally, a note on cropping. As you can see in the image above, you do not always have to show a person’s whole head in a close up portrait. In this portrait, I was really interested in Emma’s wavy hair and the flower pattern in her shirt. I came in close with a 50mm lens (equal to an 85mm on 35mm film) and only shot the right side of her face and included her hair and her shoulder. What did this technique accomplish?  It brought attention to the elements that I was interested in documenting, it excluded the dark shadows on the left side of her face, and it created a pleasing off center composition. Also, the distracting background was reduced to a soft blur.

I hope you find these tips helpful, give them a try and let me know what you think.

Tech Info:
Sigma SD9
Sigma 50mm f2.8 Macro
1/350 sec, f/3.5, ISO 100
Converted to B&W in Adobe Camera Raw

Documenting Your Family | Photo Tips | Turn Off That Flash

Red eyes, harsh glare, shiny foreheads, ugly reflections in the window – these are not the things memories are made of. That little flash built into your camera is the number one culprit in bad photographs. It’s intrusive and distracting, pulling attention away from the scene being photographed and toward the photographer. Think of it as a last resort. If you absolutely have to get a picture, and it is really dark, go ahead and use it. But how often is it that dark?

With the newer crop of digital cameras allowing the use of high ISO’s, and ever improving lenses that open up to wider apertures, we can shoot in dimmer and dimmer light without resorting to on-camera flash. Below are some tips to help you get the best photos you can using only available light:

  1. Crank up that ISO. You will see a lot written about the horrors of noise in your digital files, and you will see noise, no doubt about it. But most everyone has moved on to cameras with 8, 10, 12, or even 14 megapixels. This is much more resolution than you actually need for a 4X6 or 5X7 print. So even if the noise looks bad blown up huge on the monitor, it will be much less noticeable in an actual print.
  2. Brace yourself. When you are not using flash, you will have to use slower shutter speeds to let enough light hit the sensor to capture a properly exposed image. The problem with slower shutter speeds, is movement. If the camera moves while the shutter is open, you will get a blurry picture. Your mission is to minimize this movement. Stand as if you were on a moving train/bus, feet apart and knees slightly bent, and squeeze your elbows against your sides as you hold the camera. Ideally, there would be a wall nearby that you could lean against. Finally, gently press the shutter release, don’t mash it.
  3. Anticipate the action. Just like camera movement, subject movement will cause blurry pictures. The best way to counteract this is to pre-focus your camera on your subject and wait for a slight pause in their motion. This is especially important with kids, they are little balls of energy. Also, pictures with motion blur can be really interesting. They are much better than pictures that are simply out of focus. Embrace this.
  4. Learn to love black & white. When shooting with the available light, you are likely to have orange light from standard bulbs, green light from fluorescent bulbs, and blue light from the window all mixing together in one scene. Neutralize all these color casts by simply switching the image to black and white. One added benefit, the noise mentioned in tip one (above) looks much more like classic film grain once the image is converted to black & white.

As you practice these techniques, you will get much more comfortable shooting without the flash. You should also start to get more interesting images that look more like something you would see in a newspaper or magazine and less like a snapshot in a photo album.

Tech Info:
This is certainly not the greatest photograph that I have ever made, but I think is does a good job of illustrating the points mentioned in the blog post. Just click on the image to see it larger.
Nikon D70s (This is an old 6 megapixel DSLR)
Nikon 35mm f2 lens (An inexpensive fixed, non-zoom, lens that opens to a wide aperture)
ISO 1250 (This camera maxes out at ISO 1600)
No Flash
Mixed lighting – Window, standard light bulbs & fluorescent tubes
Converted to B&W in Adobe Camera Raw